To add the secondary collection we need to create a Custom Load Method (CLM) that will retrieve the data that we want displayed in the grid.
First we create and test the stored procedure that will become the CLM..
We then update the IDO (Intelligent Data Object) (In this case we decided not to affect the base IDO, because of release updates, so we created a copy of it for our update).
Within the IDO we add the CLM so it is accessible in the Methods.
Now we create the un-bound properties that will be used on the Form Grid for the fields returned from the CLM.
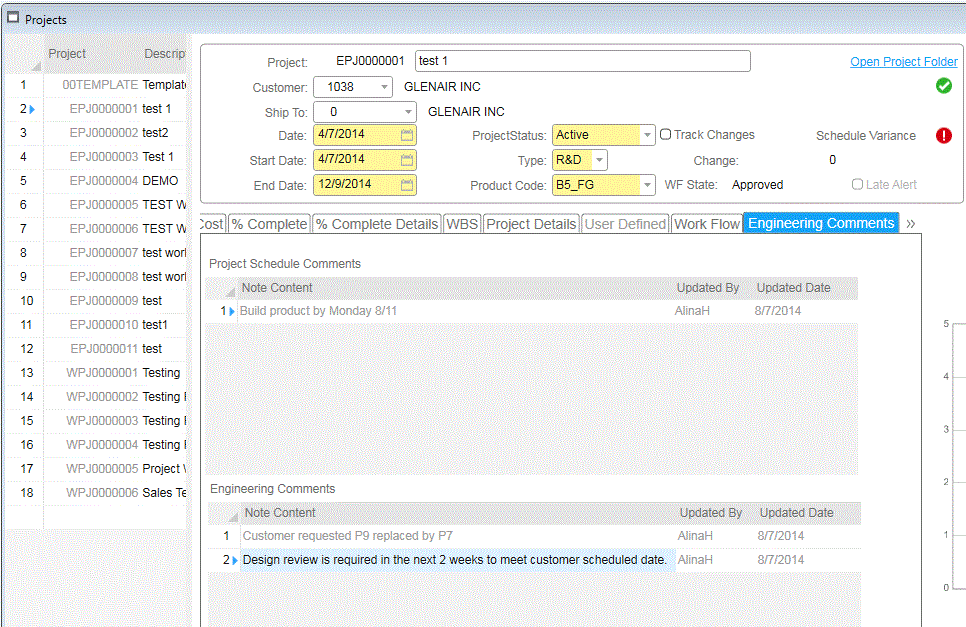
At this point we design the form and add the secondary collection(s) entering the Custom Load Method Property to the secondary collection(s) and include the Method Parameters Property with the values to pass to the CLM.
The return from the CLM will be the unbound fields we added in the IDO Properties.
Now we add the grid to the form and bind the unbound Properties to the grid items.
Note the Data Source binding to a specific object.
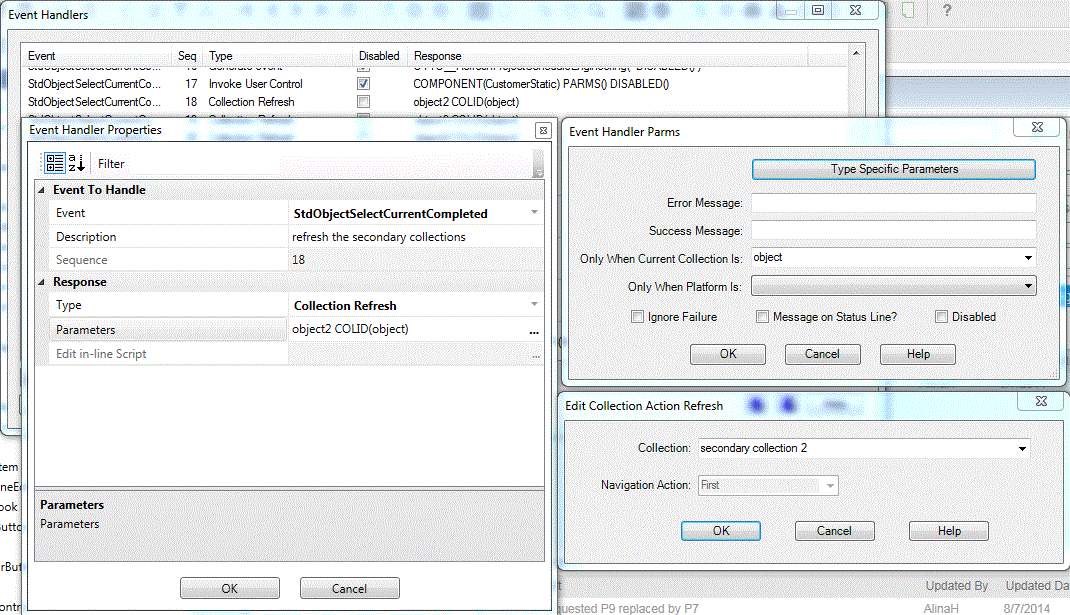
Once we have all this done we need to establish an event that will refresh the secondary collection so the data in the grid will refresh when another record is selected.
In this case we choose StdObjectSelectedCurrentCompleted for the refresh of the secondary collection.
We also set the "Only When Current Collection Is" value in the Event Handler Parms Window to the primary collection object.
Now that all this is done the Primary form should open with the details in the secondary collections changing as each record is selected.
Notes: We found that if we jus refreshed the secondary collections without the "Only When Current Collection Is" that the form would take a very long time to load (we never allowed it to complete because it was taking so long).
When building the form and IDO make sure that you "Unload All Global Objects" (ctrl+U) on a regular basis.
If you see something not working or working strangely close the application completely and start it over. This sometimes helps because a completely new session is established.


